In this section, the color scheme shown in the screenshots may differ from the actual appearance of the Control Centre.
This section contains detailed information about the Firewall modules that allow you to configure your custom traffic protection policy (using Custom Rules and Block & Allow Lists), and manage active blockages across all antifraud functionality.
We strongly advise to read the Recommendations section before making any changes in these modules.
¶ How to Set up Custom Rules
The Custom Rules method allows you to configure any real-time, threshold-based rules to monitor usage and end customers’ behavior. Once the threshold is reached, the incident can be alerted to the specified notification channels, active calls can be broken, and the corresponding traffic can be blocked for a pre-defined period.
First and foremost, these rules are HIGH USAGE rules. If you know high usage patterns of your customers, you can define the thresholds (cost, duration, the number of attempts or calls, the number of simultaneous calls, etc.) to alert suspicious usage for:
- all users;
- each individual user;
- specified user(s).
It is important to note that since you set the threshold value, you also set the severity level of the corresponding threshold. You can configure a few usage thresholds with the corresponding severity values from low to critical and trace the evolution of the situation.
Custom rules are primarily used as a probe for retail traffic, mainly to protect the operator’s retail network, but you can try using these rules to monitor hubbing traffic as well.
The Custom Rules module consists of two main tabs:
- The RULES tab with the main Custom Rules table;
- The ACTIVITY LOG tab with the history of changed made to the module.
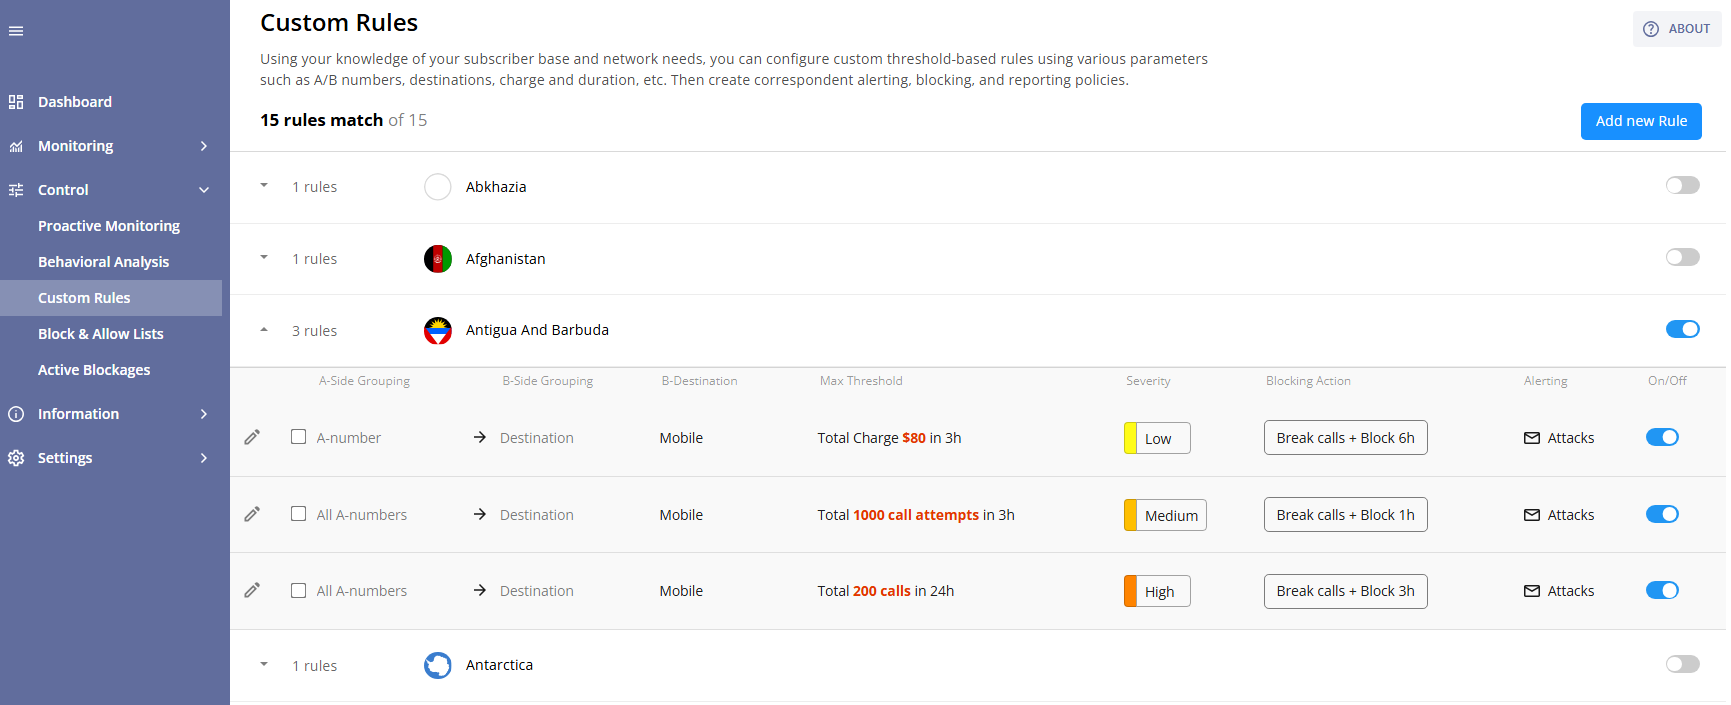
The RULES tab consists of the following parts:
- The + ADD NEW button, which allows you to create a new custom rule;
- The filters for the rules table, which allow you to search for specific rules;
- The rules table, which displays the main information about the created rules.
You can view this and any corresponding documentation page directly from the Control Centre by clicking the ? ABOUT button in the top-right corner of the page.
The filters for the rules table inclide the following options: 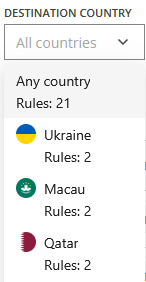
- Rule Status: Filter rules by status (Enabled, Disabled);
- Importance: Filter rules by importance level (Critical, High, Medium, or Low);
- A-side Grouping: Filter rules by groupings of originating numbers, ranges or source countries/networks;
- Source Country: Filter rules by the originating country. The amount of custom rules for each source country is displayed next to the country name;
- B-side Grouping: Filter rules by groupings of terminating numbers, ranges or destination countries/networks;
- Destination Country: Filter rules by the terminating country. The amount of custom rules for each destination country is displayed next to the country name;

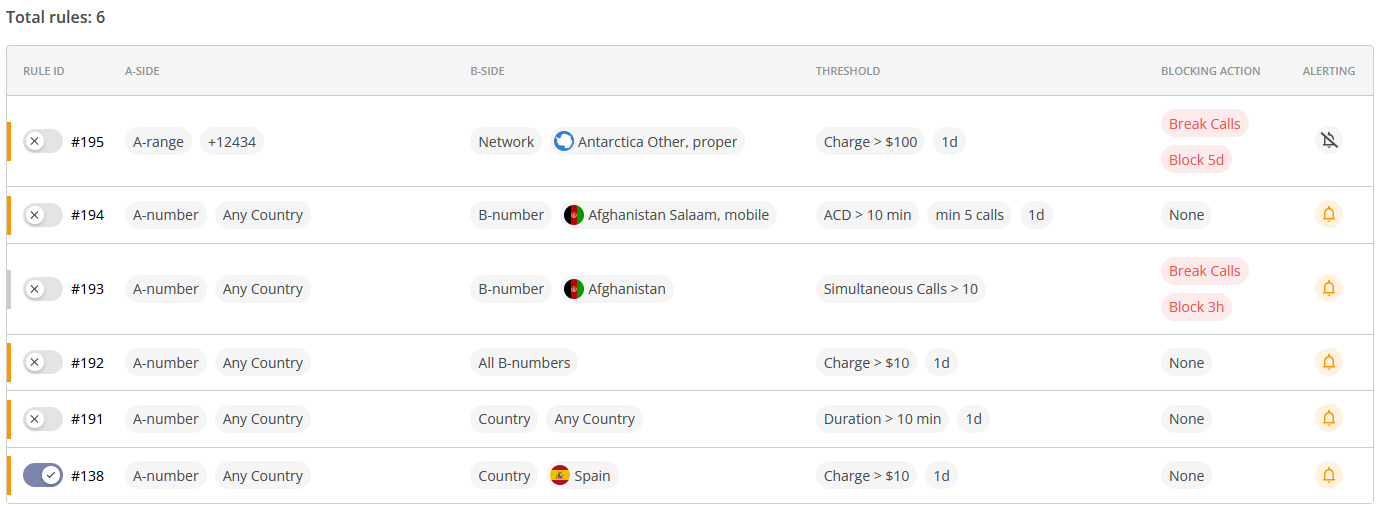
The rules table includes the following columns:
- Rule ID: A unique identifier for each rule, with a toggle to enable or disable it;
- Importance: Importance level represented by a colored flag (yellow for Low, orange for Medium, red for High, and burgundy for Critical);
- A-Side: Shows the calling (originating) grouping (all numbers, empty number, any number, specified range, or source country/network);
- B-Side: Shows the receiving (destination) grouping (all numbers, any number, specified range, or destination country/network);
- Conditions: The condition (threshold) that triggers the rule (e.g., "Charge > $100 in 1d");
- Blocking Action: The action taken when the threshold is reached (e.g., "Break Calls, Block 3h");
- Alerting: Notification settings (bell icon - alerts are enabled, muted icon - alerts are disabled).
The total number of created rules is displayed above the table in the top-right corner.
To create a new rule, click the + ADD NEW button in the top-right corner of the page, this will take you to the New Rule page.

Select the rule importance level - choose from Low, Medium, High, or Critical. We recommend that you use the chosen importance level for prioritizing monitoring efforts and alert management processes: 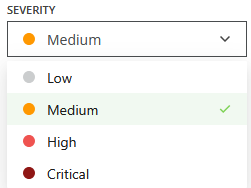
- Low: Informational only, minimal business impact;
- Medium: May indicate unusual activity but not immediately harmful;
- High: Strong indication of suspicious or risky activity, requires attention;
- Critical: Severe threat or fraud pattern detected, requires immediate action.
Next, determine the scope of the rule by selecting the appropriate options from A-side and B-side groupings.
A-side groiping allows you to choose between: 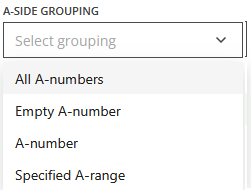
- All A-numbers for all A-numbers;
- Empty A-number for missing numbers due to number masking, the use of invalid numbers, etc.;
- Specified A-range for a defined number range (first digits) or a specific number;
- A-number for any individual number;
- Source Country for a defined calling (originating) country or any country;
- Source Network for a defined calling (originating) network or any network.
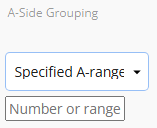
If you select "Specified A-range", you will also need to enter the first digits of a range or number in the field “Number or Range”:
If you select "Source Network" or "A-number", you need to choose a country and, optionally, a network from the dropdown list, or enter them manually (by default, any country and all networks are selected):
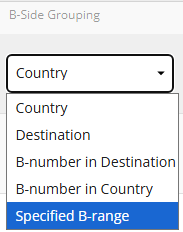
To determine the B-Side Grouping, select an appropriate option:
- All B-numbers for all B-numbers;
- Specified B-range for a defined number range (first digits) or a specific number;
- B-number for any individual number;
- Destination Country for all traffic to a given country;
- Destination Network for a specific network (proper or mobile) in a given country.
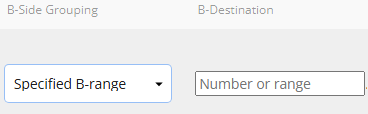
If you select “Specified B-range”, you will also need to enter the first digits of a range or a number in the field “Number or Range”:
If you select "Destination Network" or "B-number", you need to choose a country and, optionally, a network from the dropdown list, or enter them manually (by default, any country and all networks are selected):
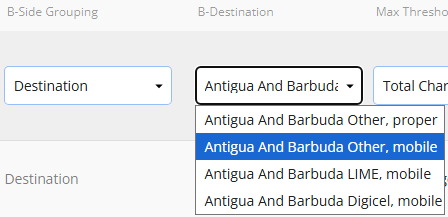
A-Side Grouping and B-Side Grouping together (Scope) form a traffic pattern.
Select a threshold parameter from the dropdown list: 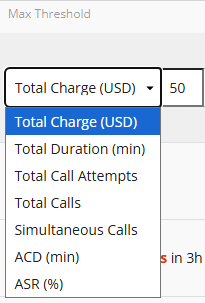
- Total charge (USD);
- Volume (min) for total duration;
- Total Call Attempts;
- Total Calls for attempts with duration only;
- Simultaneous Calls;
- ACD (min) for average call duration;
- ASR (%) for answer seizure ratio;
- Unique A-numbers;
- Unique B-numbers;
- Charge per Minute (USD).
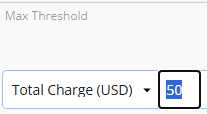
Then enter the value of the upper-threshold (i.e., the rule is triggered if the value exceeds the threshold) for the chosen parameter. You can specify multiple conditions (threshold parameters) by clicking the + (plus) button.
Next, select the value for the rule's monitoring window (i.e., the period during which statistics are collected and the threshold is applied):
After that, decide how the system should respond when the rule threshold is triggered:
- Break and block calls for a defined period: Immediately interrupts ongoing calls that match the rule conditions and prevents further calls for a defined period (you can enter the value manually, e.g., 1d);
- Leave Untoggled: If no blocking action is selected, the system will only monitor and/or alert without interrupting calls.
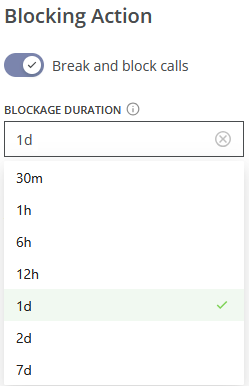
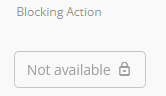
Depending on your antifraud system version the blocking actions may be unavailable. To upgrade your version, please contact your manager.
Next, decide whether you want to receive notifications when this rule is triggered:
- Unmuted: Alerts will be sent to the configured notification channels;
- Muted: No alerts will be generated for this rule, it will only apply the blocking action (if any).
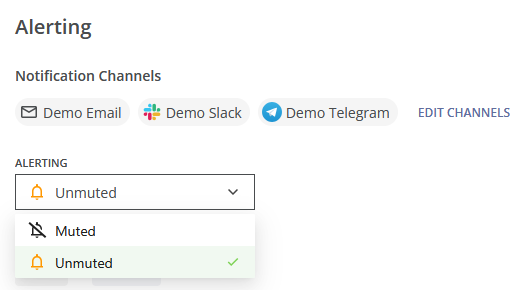
You can adjust communication channels for alerts in the Fraud Alerts module of the Alerts & Reports module group.
Alerting is the only option that can be changed later. Click the SAVE button at the bottom of the page to save the rule, or CANCEL to discard the changes.
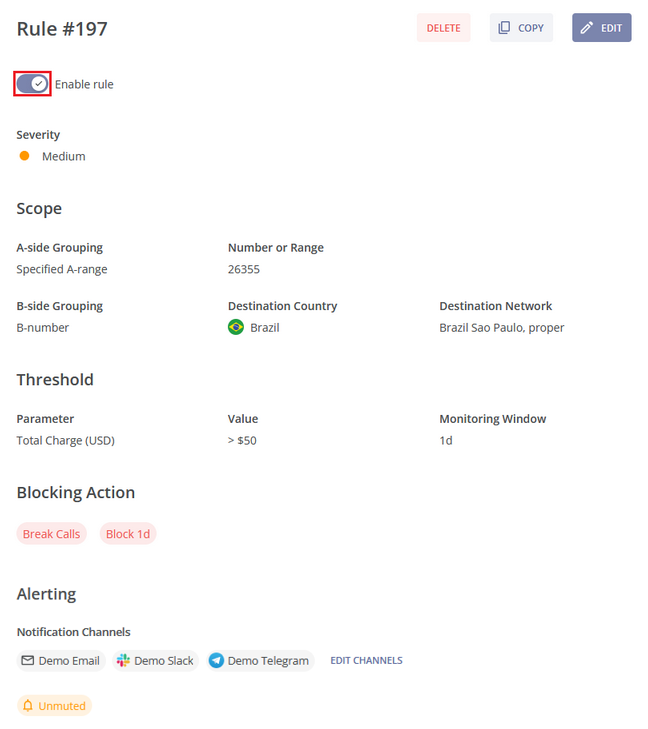
After that, you will be taken to the View Custom Rule page of the created rule where you can enable or disable it.
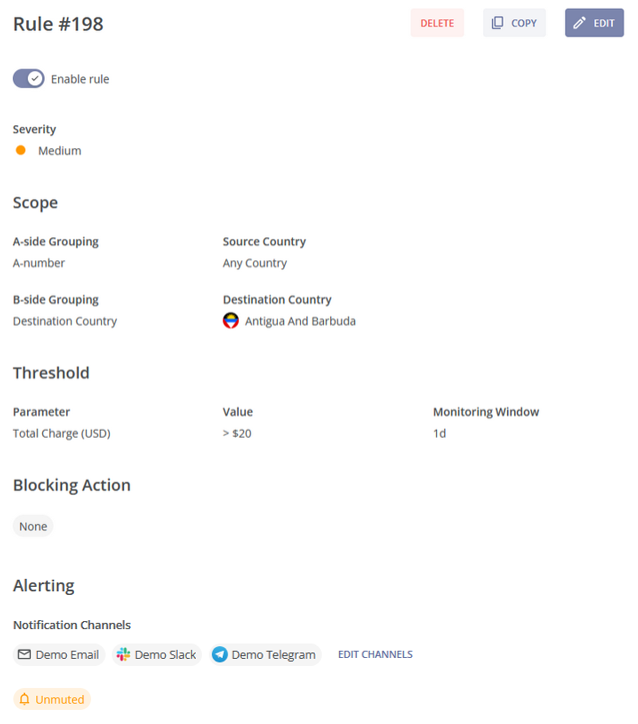
Example: You know that new traffic will soon be directed to a high-risk country (high-risk in terms of fraud termination), and you would like to set a usage rule to control the charge for each A-number calling that destination. Specifically, you want to trigger an alert if the total charge exceeds 20 USD within 24 hours per A-number. You would also like to make it a medium-severity threat, as you would like to gather more information about the A-number before taking any actions.
Click the + ADD NEW button at the top-right corner of the screen and choose the "Medium" Importance level.
In the newly created rule select "A-number" in the A-side Grouping column, and "Destination Country" in the B-side Grouping column.
Next, select "Total Charge (USD)" in the Threshold section of the page, enter “20” next to it, and select “1d” as the monitoring window.
Use the toggles at the bottom of the page to disable the Blocking Action and enable Alerting.
Click the SAVE button and, on the next page, enable the rule. Otherwise, click the CANCEL button.
Clicking any rule in the main table opens that rule's page.

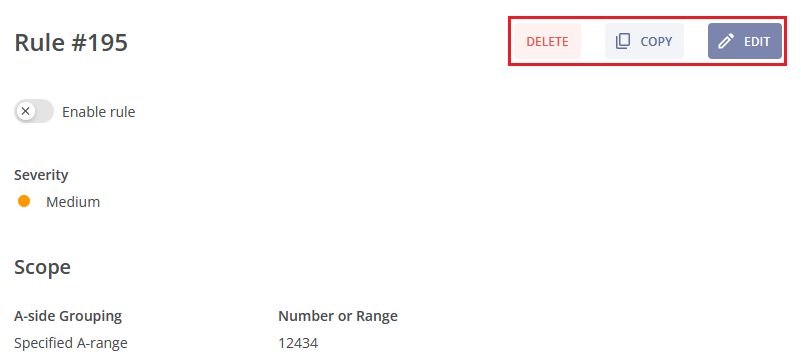
Using the buttons at the top of this page, you can DELETE a rule or COPY it.
Copying opens a new page with the same parameters as the current rule, which you can then edit to suit your needs. You can also click the EDIT button to toggle alerting for the rule on or off. And you can view the Activity Log of the specific Custom Rule in the ACTIVITY LOG TAB of the View Custom Rule page.
You can view the history of changes made to the Custom Rules module in the ACTIVITY LOG tab.
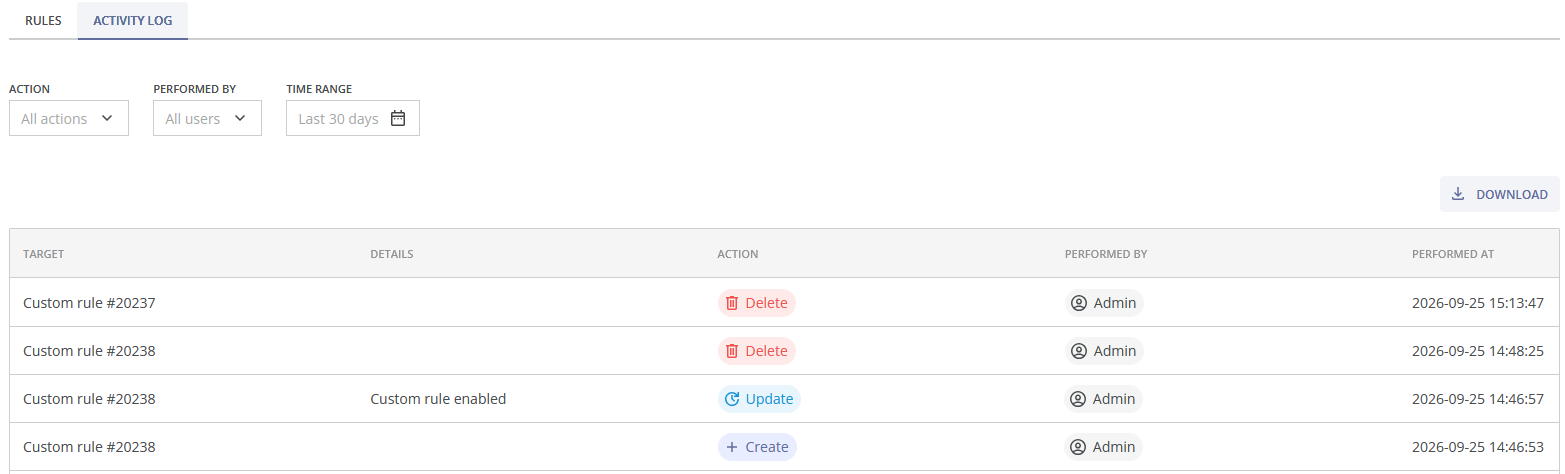
You can use the following filters at the top of the table to narrow the displayed data:
- Action: Filters records by action type (Create, Update, Extend, Delete, etc)
- Performed by: Displays activities performed by a specific user;
- Time Range: Limits results to a selected date range (you can select one of the suggested intervals from the dropdown list, e.g., Last 24 Hours, Last 7 Days, Last 30 Days, or specify a custom interval)
The activity table displays all recorded activities matching the selected filters. Activities are displayed in reverse chronological order, with the most recent events shown first. The following columns are displayed:
- Target: The custom rule affected by the action;
- Details: A summary of the performed operation or the changes made;
- Action: The type of operation performed (displayed as a colored status badge);
- Performed By: The user that initiated the action;
- Performed At: Indicates when the activity occurred. Recent events are displayed in relative time (e.g., "2h ago"), while older entries display the full timestamp.
You can click the LOAD MORE button at the bottom of the table to display more entries.
To download the filtered data, click the  DOWNLOAD button. You can choose the file format (csv or tsv) and the separator (semicolon, comma, or tab).
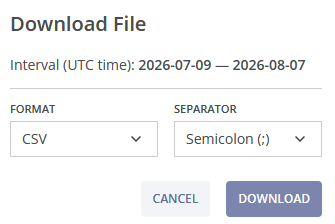
The exported file contains the following columns:
- Performed at (UTC): Date and time when the action was performed;
- Action: Action type;
- Actor ID: Internal identifier of the user who performed the action;
- Performed By: User name;
- Target Entity Type: Type of the affected object;
- Target Entity ID: Internal identifier of the affected object;
- Target Entity Name: Name of the affected object;
- Details: Additional information about the operation, if available;
- Raw Data: Complete JSON payload containing all recorded event details.

¶ List Management
The List Management module allows you to add A-number ranges and B-number ranges to the Block List and to the Allow List.
On the main page of the module, there is a table which includes four predefined lists:
- Block List of A-numbers;
- Block List of B-numbers;
- Allow List of A-numbers;
- Allow List of B-numbers.
The table provides the description of each list, as well as the quantity of number ranges in every list and the date of the last update.
You can view this and any corresponding documentation page directly from the Control Centre by clicking the ? ABOUT button in the top-right corner of the page.
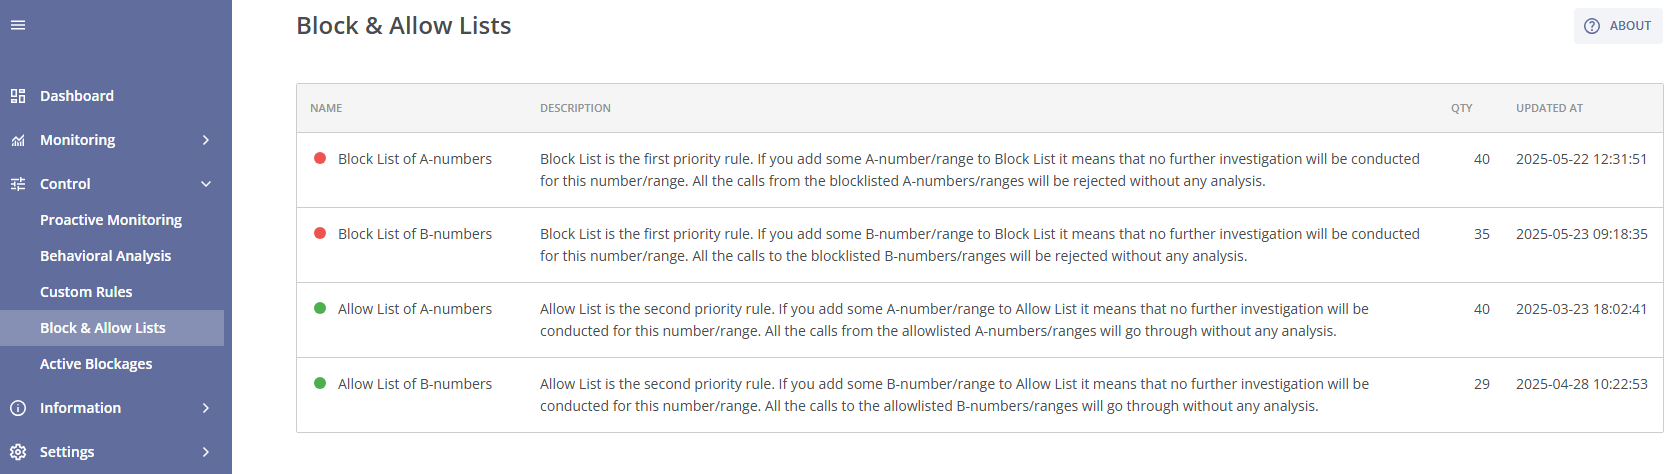
You can learn more about a particular list by clicking on it.
¶ Block List of A-numbers
The Block List operates as the highest priority rule. Adding an A-number or range to the Block List means that no further investigation will be conducted for this number or range. All calls from blocklisted A-numbers or ranges will be rejected without any analysis.
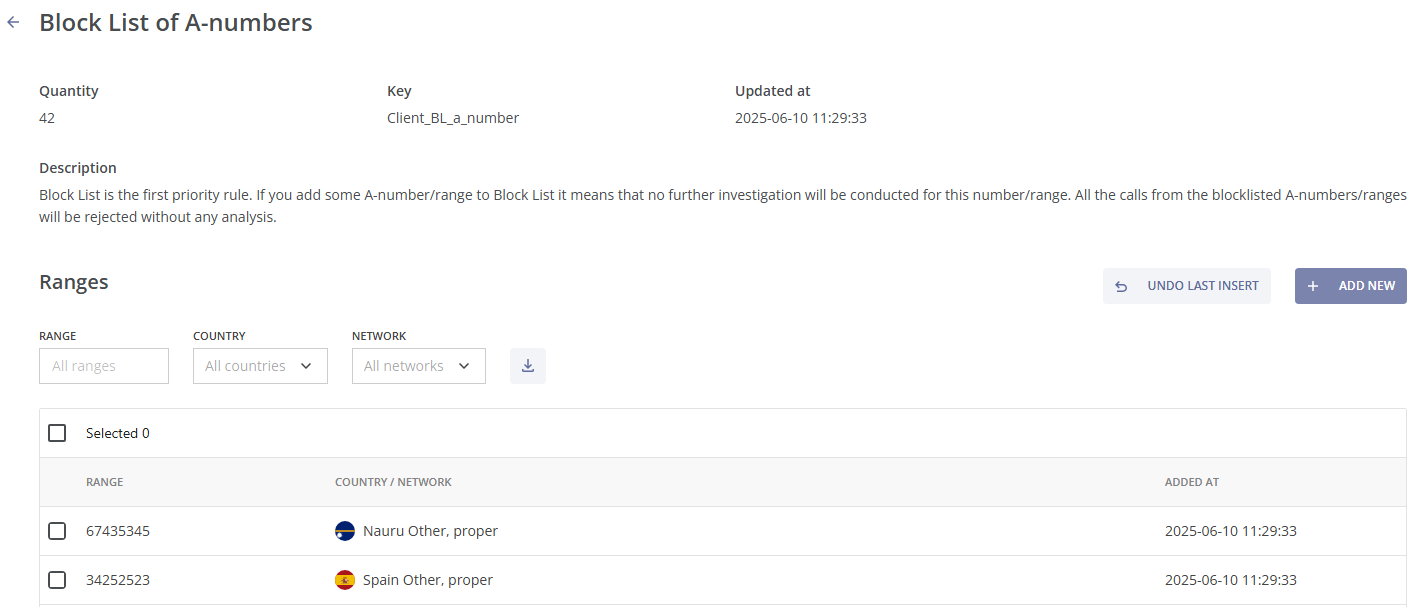
The Block List of A-numbers page consists of two main tabs:
- The LIST INFO tab with the main information about the list;
- The ACTIVITY LOG tab with the history of changed made to the module
At the top of LIST INFO tab, there is information about the quantity of A-number ranges in the list, the key field (the list ID), the date and time of the last update, and the description of the list.
In the table below the description, you can find all blocklisted A-number ranges, along with the details such as country, network, and the date and time the range was added. The table shows 10 most recently added ranges (of the total amount).
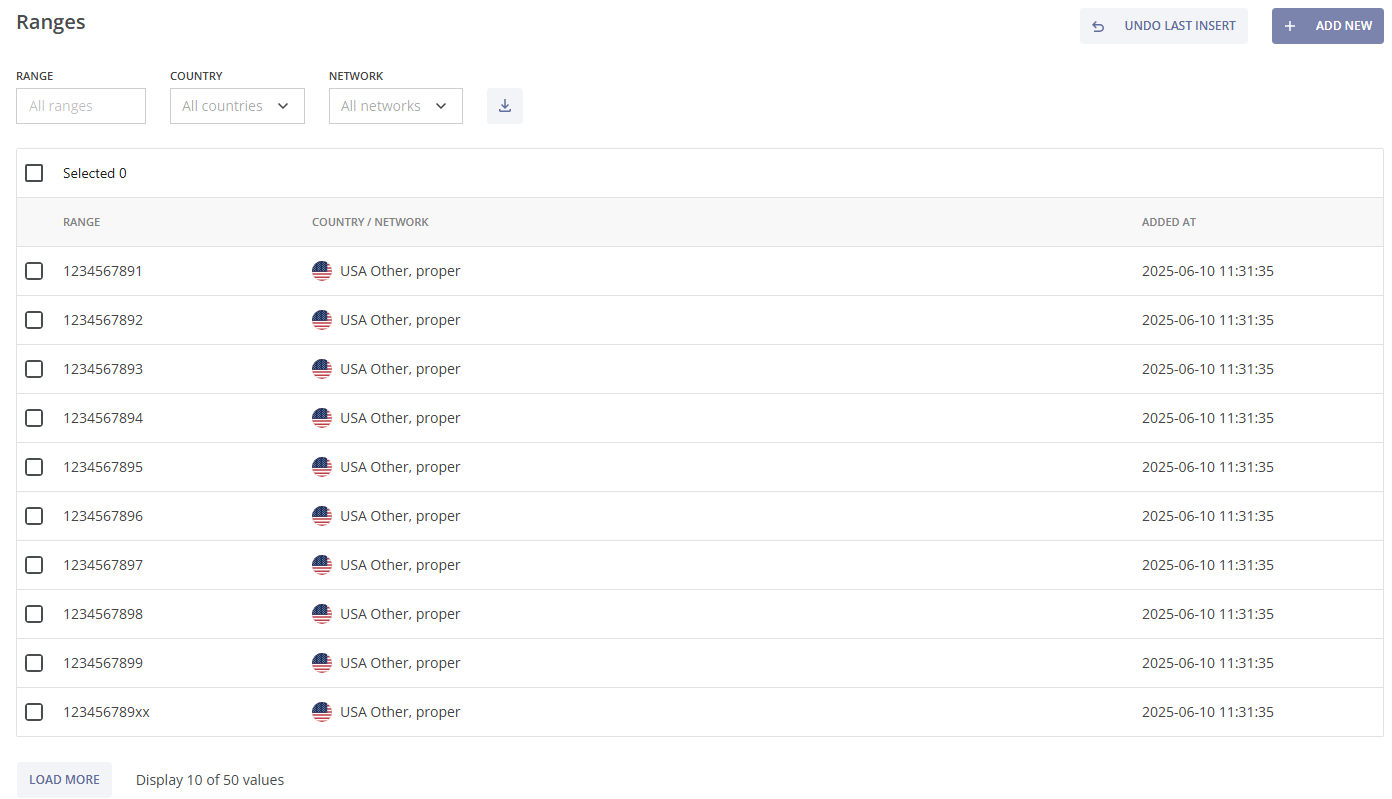
To view more blocklisted A-number ranges, click the LOAD MORE button at the bottom left of the page.

To find a specific number range, you can use multiple filters located at the top of the table:
- Range: Enter the number or range manually.
- Country: Select a country from a dropdown list or enter the name manually.
- Network: Select a network from a dropdown list or enter the name manually.
You can remove a filter by hovering over it and clicking the x (cross) button or by clicking the RESET button, which clears all selected filters.

You can download a CSV file of the blocklisted A-number ranges by clicking the DOWNLOAD button.
To delete a specific number range (or multiple ranges), check the box  on the left side of the range, and click the DELETE button at the top right of the table.
To delete all A-number ranges from the Block List, load the full list, check the box at the top left of the table, and click the DELETE button.

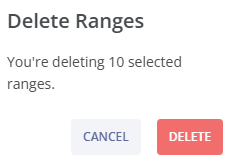
A pop-up notification will appear, asking you to confirm the deletion. Click the CANCEL button to stop or the DELETE button to proceed with the deletion.
To add a new A-number range (or several ranges) to the Block List click the + ADD VALUES button at the top right above the table. You will be directed to the Add Values page, which consists of two tabs: MANUAL and UPLOAD.
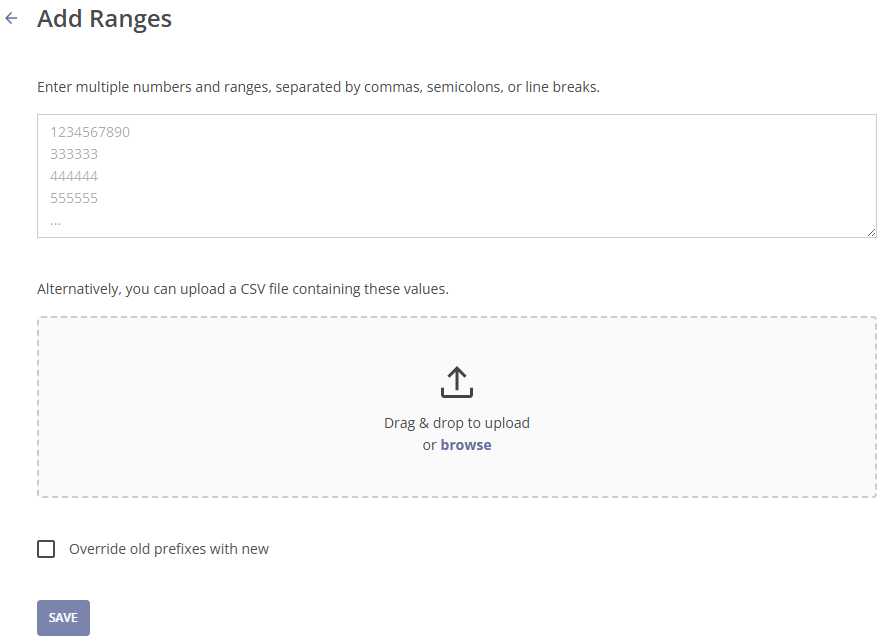
There are two ways to add a new A-number range (or several ranges) to the Block List:
Manual Entry
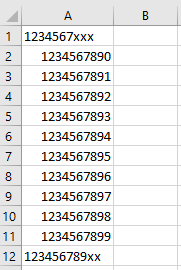
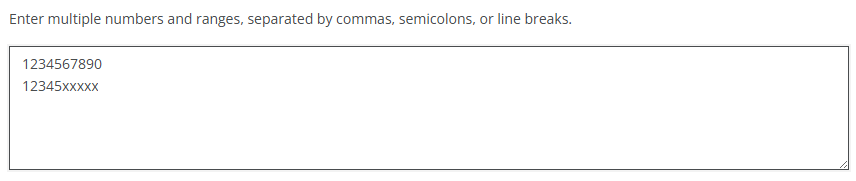
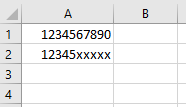
At the top half of the page, you can enter multiple numbers or number ranges, separated by commas, semicolons, or line breaks. You can use the “x” symbol to define the amount of digits in the number range. For example, entering 12345xxxxx blocks the range 12345, with phone numbers that must have 10 digits. Numbers with more or fewer digits will not match.
Enter the number or range in international format: country code and the subscriber number (or the first digits of the subscriber number). For example, 1234567890, where 1 is the country code, 234567890 is the subscriber's number.
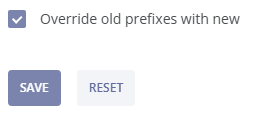
Check the box at the bottom left side of the page to override existing ranges with the new ones, or leave it unchecked to keep the existing ranges.
Next, click the SAVE button to add the new ranges to the list, or click the RESET button to reset the changes.
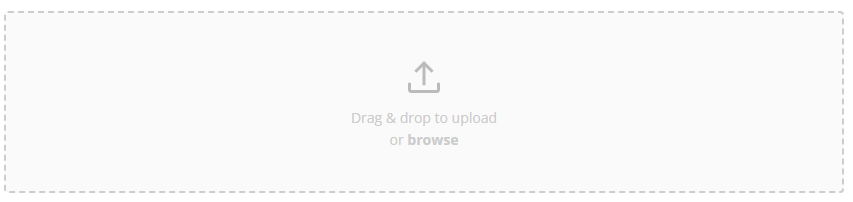
Upload a CSV File
Alternatively, you can upload a CSV file containing the numbers or ranges by dragging the file from your computer and dropping it into the upload section of the page, or by clicking the upload box to browse for the file on your system.
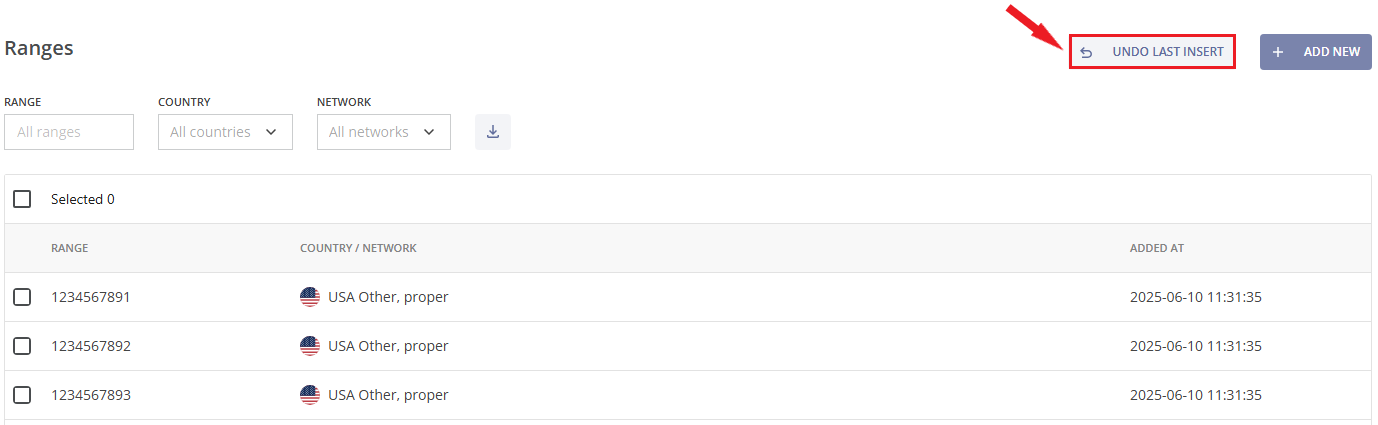
To undo the most recent addition of A-number ranges to the Block List, return to the Block List of A-numbers page and click the UNDO LAST INSERT button located in the middle right section of the page.
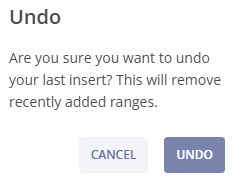
Next, click the UNDO button to remove the most recent addition to the list, or click the CANCEL button to abort this action.
¶ Block List of B-numbers
The Block List operates as the highest priority rule. Adding a B-number or range to the Block List means that no further investigation will be conducted for this number or range. All calls to blocklisted B-numbers or ranges will be rejected without any analysis.
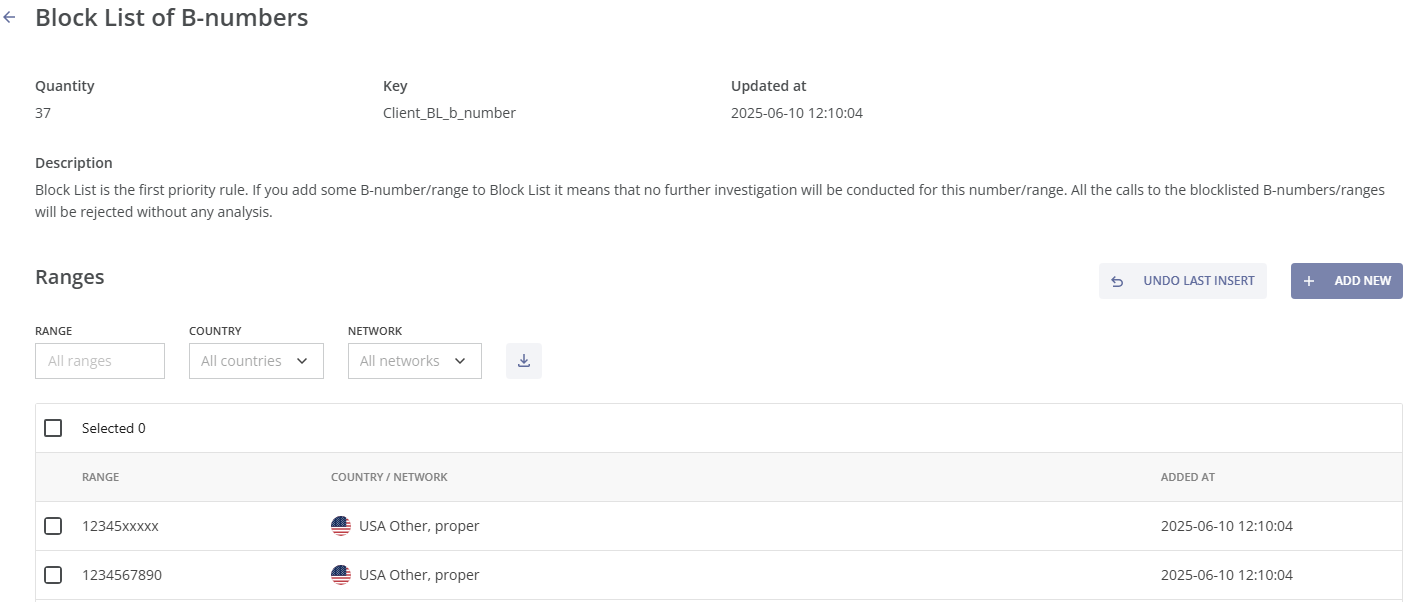
At the top of the page, there is information about the quantity of B-number ranges in the list, the key field (the list ID), the date and time of the last update, and the description of the list.
In the table below the description, you can find all blocklisted B-number ranges, along with the details such as country, network, and the date and time the range was added. The table shows 10 most recently added ranges (of the total amount).
To view more blocklisted B-number ranges, click the LOAD MORE button at the bottom left of the page.
To find a specific number range, you can use multiple filters located at the top of the table:
- Range: Enter the number or range manually.
- Country: Select a country from a dropdown list or enter the name manually.
- Network: Select a network from a dropdown list or enter the name manually.
You can remove a filter by hovering over it and clicking the x (cross) button or by clicking RESET, which clears all selected filters.
You can download a CSV file of the blocklisted B-number ranges by clicking the DOWNLOAD button.
To delete a specific number range (or multiple ranges), check the box on the left side of the range, and click the DELETE button at the top right of the table.
To delete all B-number ranges from the Block List, load the full list, check the box at the top left of the table, and click the DELETE button.
A pop-up notification will appear, asking you to confirm the deletion. Click the CANCEL button to stop or the DELETE button to proceed with the deletion.
To add a new B-number range (or several ranges) to the Block List click the + ADD VALUES button at the top right above the table. You will be directed to the Add Values page, which consists of two tabs: MANUAL and UPLOAD.
There are two ways to add a new B-number range (or several ranges) to the Block List:
Manual Entry
At the top half of the page, you can enter multiple numbers or number ranges, separated by commas, semicolons, or line breaks. You can use the “x” symbol to define the amount of digits in the number range. For example, entering 12345xxxxx blocks the range 12345, with phone numbers that must have 10 digits. Numbers with more or fewer digits will not match.
Enter the number or range in international format: country code and the subscriber number (or the first digits of the subscriber number). For example, 1234567890, where 1 is the country code, 234567890 is the subscriber's number.
Check the box at the bottom left side of the page to override existing ranges with the new ones, or leave it unchecked to keep the existing ranges.
Next, click the SAVE button to add the new ranges to the list, or click the RESET button to reset the changes.
Upload a CSV File
Alternatively, you can upload a CSV file containing the numbers or ranges by dragging the file from your computer and dropping it into the upload section of the page, or by clicking the upload box to browse for the file on your system.
To undo the most recent addition of B-number ranges to the Block List, return to the Block List of B-numbers page and click the UNDO LAST INSERT button located in the middle right section of the page.
Next, click the UNDO button to remove the most recent addition to the list, or click the CANCEL button to abort this action.
¶ Allow List of A-numbers
The Allow List operates as the second highest priority rule. Adding an A-number or range to the Allow List means that no further investigation will be conducted for this number or range. All calls from allowlisted A-numbers or ranges will pass through without any analysis.
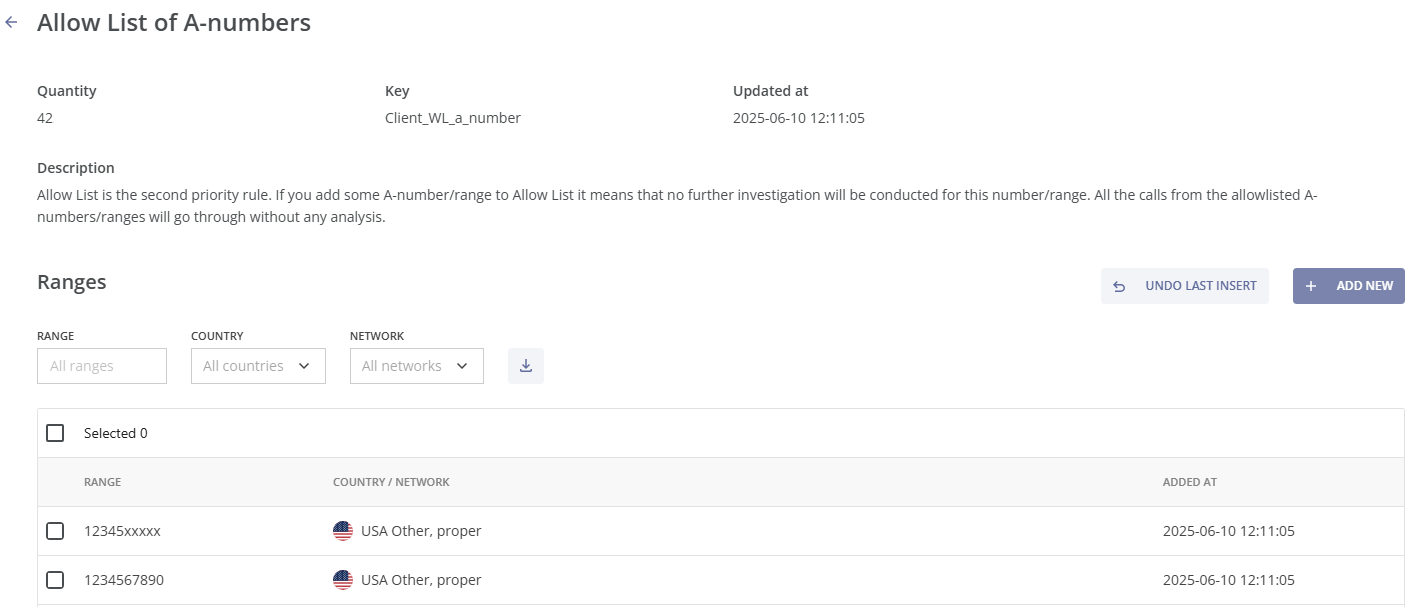
At the top of the page, there is information about the quantity of A-number ranges in the list, the key field (the list ID), the date and time of the last update, and the description of the list.
In the table below the description, you can find all allowlisted A-number ranges, along with the details such as country, network, and the date and time the range was added. The table shows 10 most recently added ranges (of the total amount).
To view more allowlisted A-number ranges, click the !the LOAD MORE button at the bottom left of the page.
To find a specific number range, you can use multiple filters located at the top of the table:
• Range: Enter the number or range manually.
• Country: Select a country from a dropdown list or enter the name manually.
• Network: Select a network from a dropdown list or enter the name manually.
You can remove a filter by hovering over it and clicking the x (cross) button or by clicking RESET, which clears all selected filters.
You can download a CSV file of the allowlisted A-number ranges by clicking the DOWNLOAD button.
To delete a specific number range (or multiple ranges), check the box on the left side of the range, and click the DELETE button at the top right of the table.
To delete all A-number ranges from the Allow List, load the full list, check the box at the top left of the table, and click the DELETE button.
A pop-up notification will appear, asking you to confirm the deletion. Click the CANCEL button to stop or the DELETE button to proceed with the deletion.
To add a new A-number range (or several ranges) to the Allow List click on the + ADD VALUES button at the top right above the table. You will be directed to the Add Values page, which consists of two tabs: MANUAL and UPLOAD.
There are two ways to add a new A-number range (or several ranges) to the Allow List:
Manual Entry
At the top half of the page, you can enter multiple numbers or number ranges, separated by commas, semicolons, or line breaks. You can use the “x” symbol to define the amount of digits in the number range. For example, entering 12345xxxxx allows the range 12345, with phone numbers that must have 10 digits. Numbers with more or fewer digits will not match.
Enter the number or range in international format: country code and the subscriber number (or the first digits of the subscriber number). For example, 1234567890, where 1 is the country code, 234567890 is the subscriber's number.
Check the box at the bottom left side of the page to override existing ranges with the new ones, or leave it unchecked to keep the existing ranges.
Next, click the SAVE button to add the new ranges to the list, or click the RESET button to reset the changes.
Upload a CSV File
Alternatively, you can upload a CSV file containing the numbers or ranges by dragging the file from your computer and dropping it into the upload section of the page, or by clicking the upload box to browse for the file on your system.
To undo the most recent addition of A-number ranges to the Allow List, return to the Allow List of A-numbers page and click the UNDO LAST INSERT button located in the middle right section of the page.
Next, click the UNDO button to remove the most recent addition to the list, or click the CANCEL button to abort this action.
¶ Allow List of B-numbers
The Allow List operates as the second highest priority rule. Adding a B-number or range to the Allow List means that no further investigation will be conducted for this number or range. All calls to allowlisted B-numbers or ranges will pass through without any analysis.
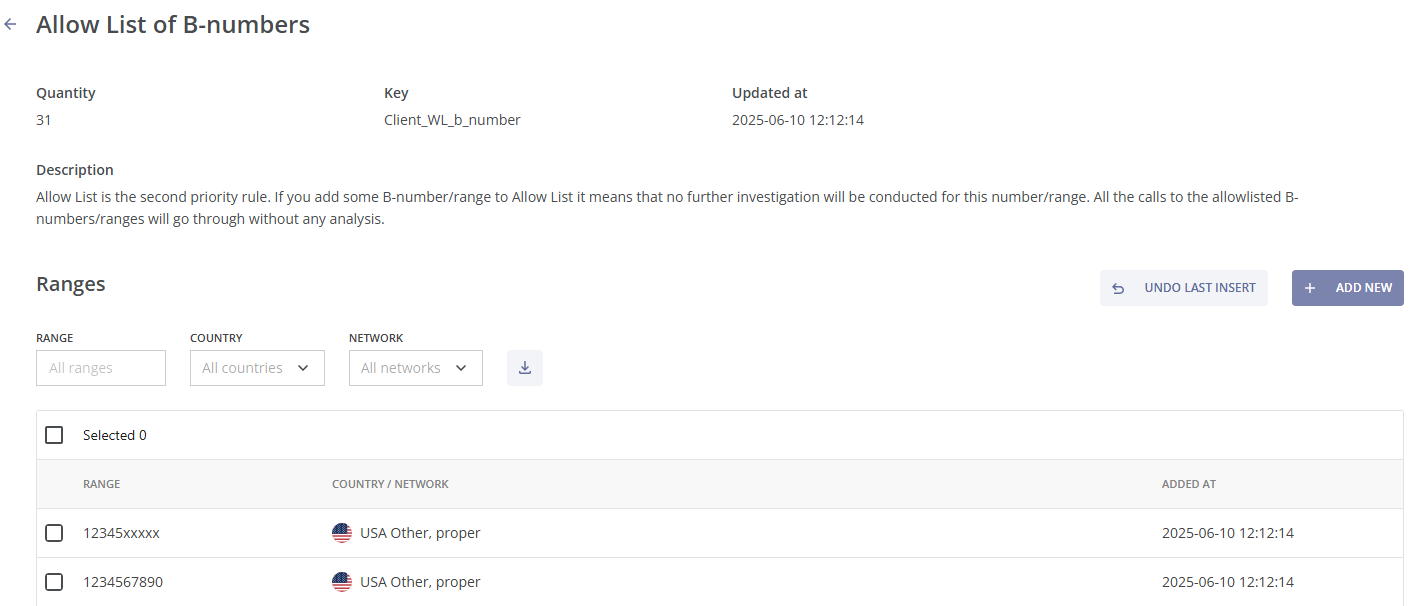
At the top of the page, there is information about the quantity of B-number ranges in the list, the key field (the list ID), the date and time of the last update, and the description of the list.
In the table below the description, you can find all allowlisted B-number ranges, along with the details such as country, network, and the date and time the range was added. The table shows 10 most recently added ranges (of the total amount).
To view more allowlisted B-number ranges, click the LOAD MORE button at the bottom left of the page.
To find a specific number range, you can use multiple filters located at the top of the table:
• Range: Enter the number or range manually.
• Country: Select a country from a dropdown list or enter the name manually.
• Network: Select a network from a dropdown list or enter the name manually.
You can remove a filter by hovering over it and clicking the x (cross) button or by clicking RESET, which clears all selected filters.
You can download a CSV file of the allowlisted B-number ranges by clicking the DOWNLOAD button.
To delete a specific number range (or multiple ranges), check the box on the left side of the range, and click the DELETE button at the top right of the table.
To delete all B-number ranges from the Allow List, load the full list, check the box at the top left of the table, and click the DELETE button.
A pop-up notification will appear, asking you to confirm the deletion. Click the CANCEL button to stop or the DELETE button to proceed with the deletion.
To add a new B-number range (or several ranges) to the Allow List click on the + ADD VALUES button at the top right above the table. You will be directed to the Add Values page, which consists of two tabs: MANUAL and UPLOAD.
There are two ways to add a new B-number range (or several ranges) to the Allow List:
Manual Entry
At the top half of the page, you can enter multiple numbers or number ranges, separated by commas, semicolons, or line breaks. You can use the “x” symbol to define the amount of digits in the number range. For example, entering 12345xxxxx allows the range 12345, with phone numbers that must have 10 digits. Numbers with more or fewer digits will not match.
Enter the number or range in international format: country code and the subscriber number (or the first digits of the subscriber number). For example, 1234567890, where 1 is the country code, 234567890 is the subscriber's number.
Check the box at the bottom left side of the page to override existing ranges with the new ones, or leave it unchecked to keep the existing ranges.
Next, click the SAVE button to add the new ranges to the list, or click the RESET button to reset the changes.
Upload a CSV File
Alternatively, you can upload a CSV file containing the numbers or ranges by dragging the file from your computer and dropping it into the upload section of the page, or by clicking the upload box to browse for the file on your system.
To undo the most recent addition of B-number ranges to the Allow List, return to the Allow List of B-numbers page and click the UNDO LAST INSERT button located in the middle right section of the page.
Next, click the UNDO button to remove the most recent addition to the list, or click the CANCEL button to abort this action.
¶ List Activity Log
You can view the history of changes made to a List in the ACTIVITY LOG tab of the specific List page.
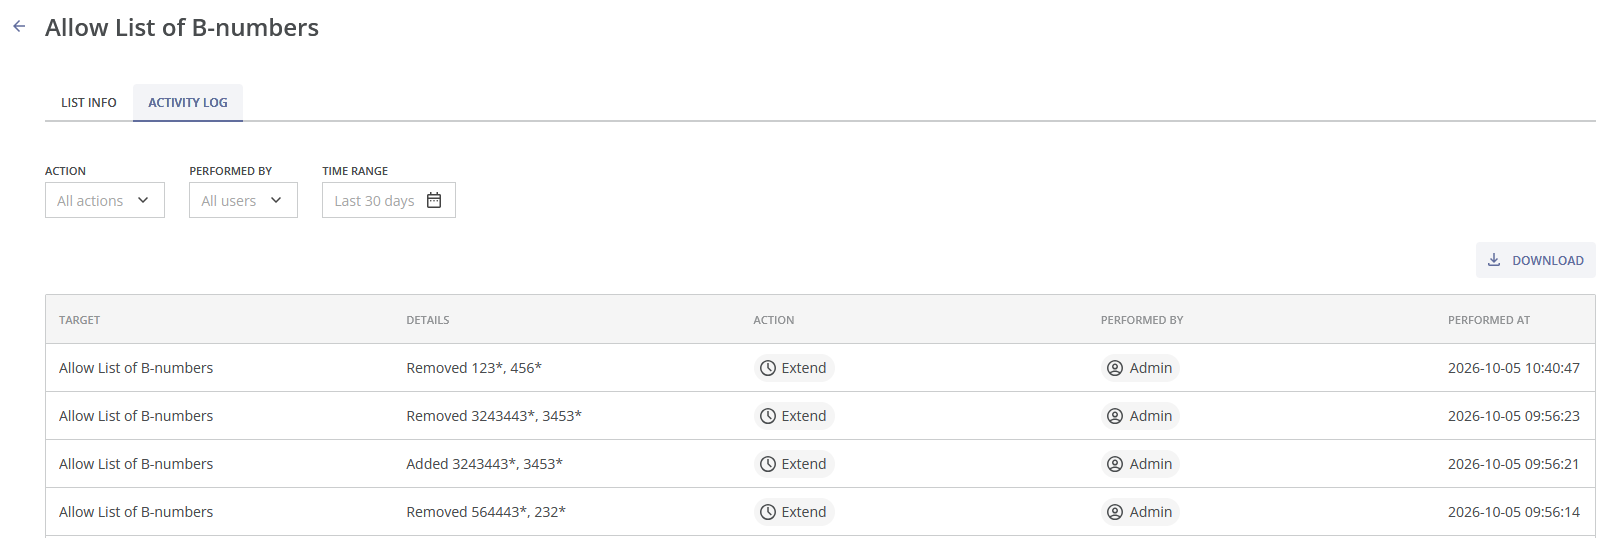
You can use the following filters at the top of the table to narrow the displayed data:
- Action: Filters records by action type (Create, Update, Extend, Delete, etc)
- Performed by: Displays activities performed by a specific user;
- Time Range: Limits results to a selected date range (you can select one of the suggested intervals from the dropdown list, e.g., Last 24 Hours, Last 7 Days, Last 30 Days, or specify a custom interval)
The activity table displays all recorded activities matching the selected filters. Activities are displayed in reverse chronological order, with the most recent events shown first. The following columns are displayed:
- Target: The list affected by the action;
- Details: A summary of the performed operation or the changes made;
- Action: The type of operation performed (displayed as a colored status badge);
- Performed By: The user that initiated the action;
- Performed At: Indicates when the activity occurred. Recent events are displayed in relative time (e.g., "2h ago"), while older entries display the full timestamp.
You can click the LOAD MORE button at the bottom of the table to display more entries.
To download the filtered data, click the DOWNLOAD button. You can choose the file format (csv or tsv) and the separator (semicolon, comma, or tab).
The exported file contains the following columns:
- Performed at (UTC): Date and time when the action was performed;
- Action: Action type;
- Actor ID: Internal identifier of the user who performed the action;
- Performed By: User name;
- Target Entity Type: Type of the affected object;
- Target Entity ID: Internal identifier of the affected object;
- Target Entity Name: Name of the affected object;
- Details: Additional information about the operation, if available;
- Raw Data: Complete JSON payload containing all recorded event details.

¶ Active Blockages
This module provides information about all active blockages set by the antifraud system.
The Active Blockages module consists of the following parts:
- Filters for the table of active blockages;
- The table of active blockages;
- The Active Blockage Details page.
You can view this and any corresponding documentation page directly from the Control Centre by clicking the ? ABOUT button in the top-right corner of the page.
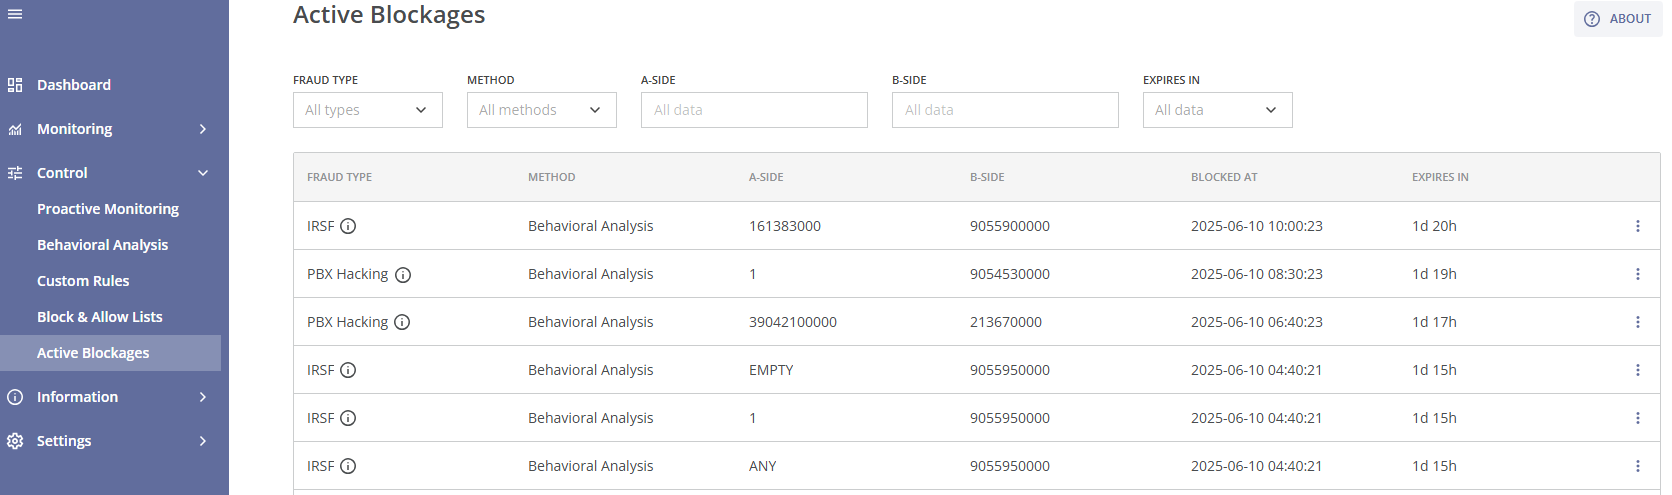
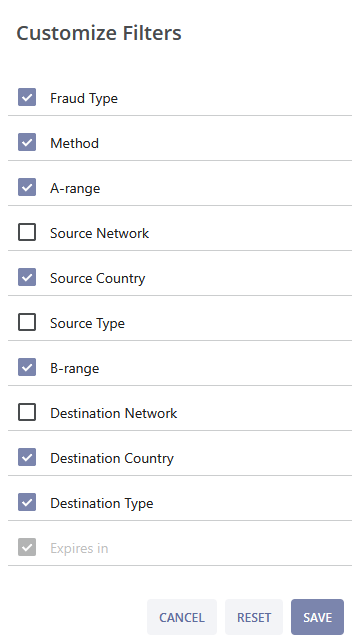
In order to find the needed active blockages, you can use multiple filters in the top section of the page:

- Fraud Type: A dropdown list that allows you to specify the fraud type (PBX Hacking, Wangiri, Spam/Scam Calls and others);
- Fraud Probability: A dropdown list that allows you to filter blockages by their estimated probability of being fraudulent (90–99%, 99–99.9%, 99.9–99.99%, and greater than 99.99%);
- Importance: A dropdown list that allows you to select blockages by their importance level (set manually for custom rules);
- Method: A dropdown list that allows you to narrow the results based on the protection methods used (Behavioral Analysis, Proactive Monitoring, Custom Rule);
- Rule ID: A dropdown list that allows you to choose blockages, based on the applied Custom rule;
- Source Gateway: Filter results based on the originating gateway (e.g., the client's custom id). If the call information does not contain gateway information, the filter will not be displayed;
- A-range: Filter blockages based on the calling (source) side, which can include a number range, a country or a network; this information can be entered manually;
- Source Network: A dropdown list that allows you to choose blockages based on the originating network; you can enter the network name manually;
- Source Country: A dropdown list that allows you to choose blockages based on the originating country; you can enter the country name manually;
- B-range: Filter blockages based on the called (destination) side, which can include a number range, a country or a network; this information can be entered manually;
- Destination Network: A dropdown list that allows you to choose blockages based on the terminating network; you can enter the network name manually;
- Destination Country: A dropdown list, that allows you to choose blockages based on the terminating country; you can enter the country name manually;
- Expires In: Select the expiration time for displaying active blockages by choosing one of the suggested intervals from the dropdown list (Less than 1 hour, From 1 hour to 12 hours, From 12 hours to 24 hours, From 1 day to 7 days, More than 7 days).
Clicking the customize button  allows you to customize your filters. After selecting the needed filter parameters click the SAVE button to apply changes, or click the RESET button to revert the changes to the previous setup. Click the CANCEL button to cancel the changes and exit the pop-up window.
All filters affect the table of active blockages.
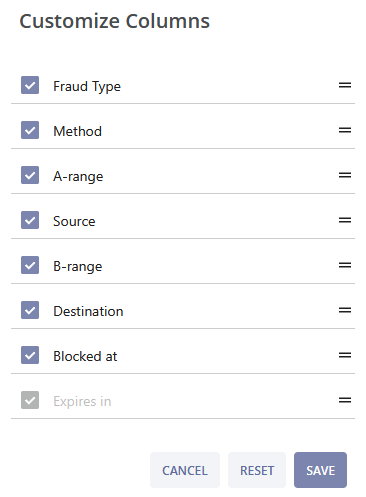
Each active blockage includes the following details: fraud type, protection method, A-range (number range, country, or network), source (country and/or network name), B-range (number range, country, or network), destination (country and/or network name), date and time of blocking, and blockage expiration time. But you can also add the following columns: fraud probability, importance, rule ID, and source gateway.
You can customize the columns by clicking the button above the table. Here you can add (or remove) the needed columns by ticking (or unticking) the box on the left, or change the order of columns in the table by holding down the = button and moving the corresponding column up or down. After customizing the columns click the SAVE button to apply the changes, or click the RESET button to revert the changes to the previous setup. Click the CANCEL button to cancel the changes and exit the pop-up window.
Clicking the add widget button  above the table will take you to the New Widget page. This allows you to quickly convert existing views into Dashboard widgets. The system pre-fills: data source, widget type, filters, columns (for the tables). You must select the target dashboard and the target widget group. This functionality is further detailed in the Dashboard module.
To see a brief description of the detected fraud type, hover over the  symbol.
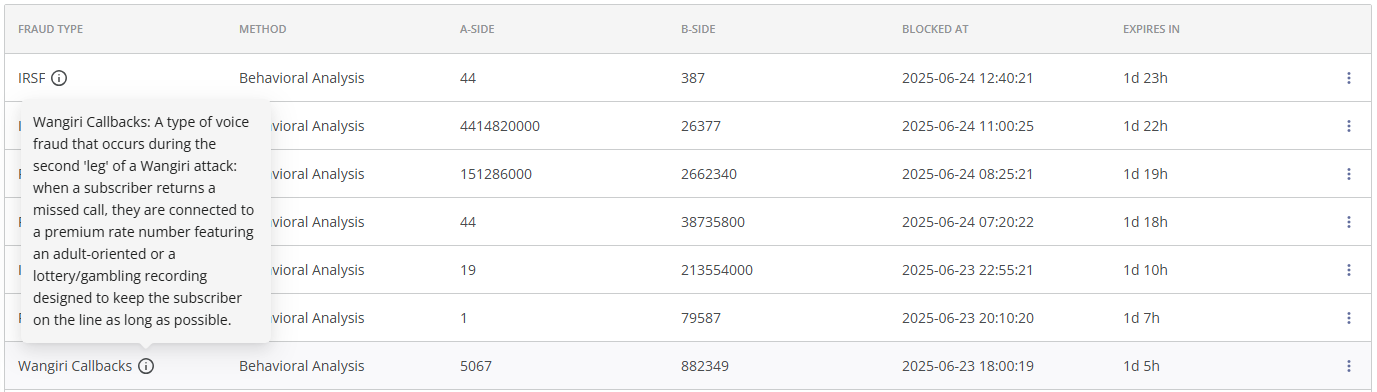
You can click the three dots  on the right side of the blockage to see the available options. There will be two options: 'View Fraud Call Attempts' and 'Unblock'.

If you click on the 'View Fraud Call Attempts' option, you will be taken to the corresponding Fraud Call Attempts page with the selected Blockage ID and the fraudulent call attempts blocked by it.
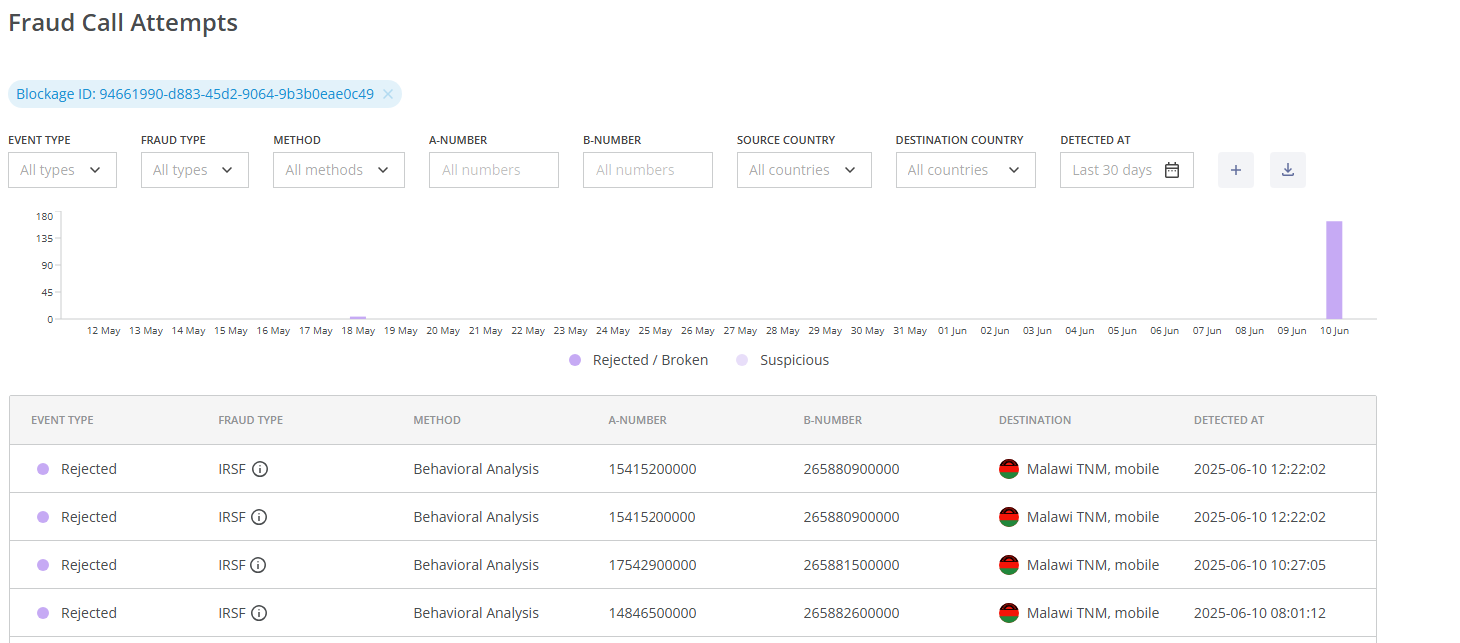
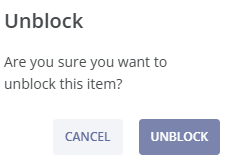
You can also use the 'Unblock' option to remove the blockage (if the fraud management team decides that the blockage is unnecessary or excessive). Click the UNBLOCK button to unblock the traffic, or click the CANCEL button to cancel the unblocking action.
You can click the LOAD MORE button at the bottom of the page to view more active blockages.
You can learn more about a particular active blockage by clicking on it. You will be taken to the Active Blockage Details page.
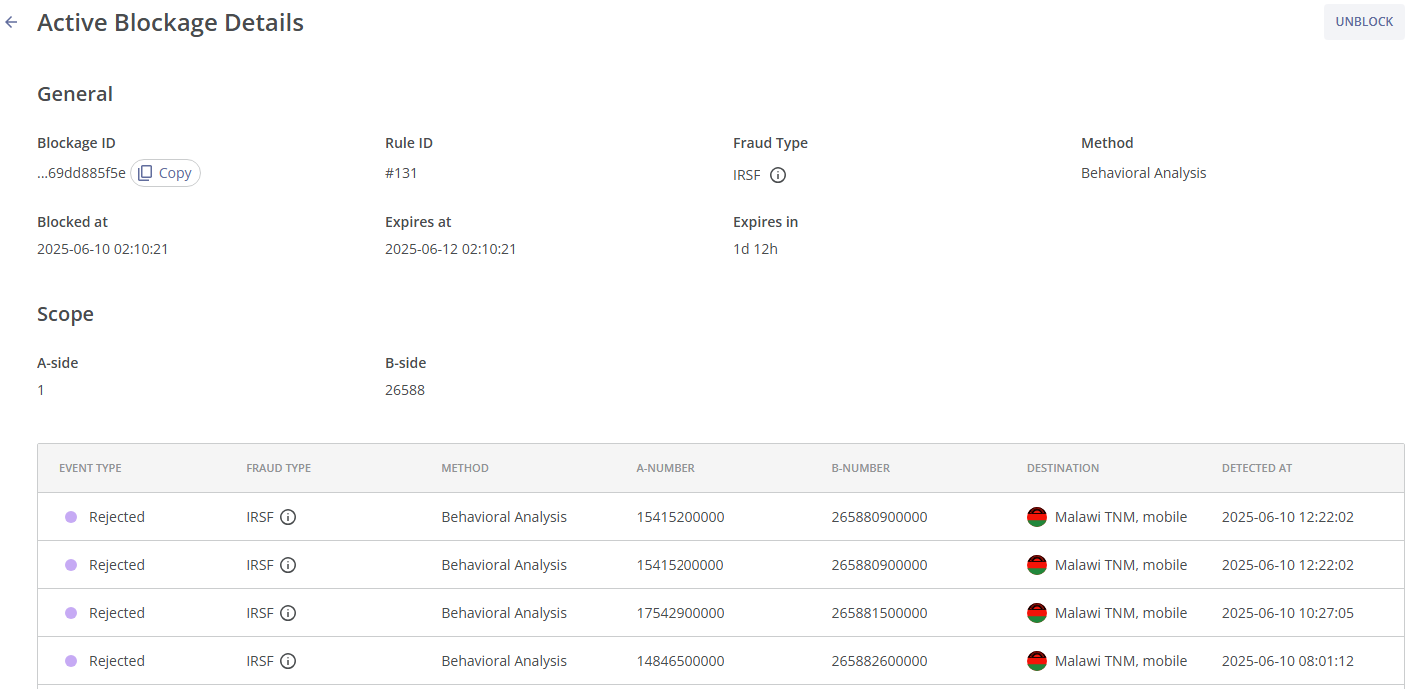
This page consists of three tabs:
- The INFO tab contains the general blockage information;
- The CALL ATTEMPTS tab contains the Related Fraud Call Attempts table;
- The ATTACKS tab contains the Related Fraud Attacks table.
If you want to delete this blockage, click the UNBLOCK button in the top right corner of the page.
The INFO tab consists of two sections:
- General. This section contains the following information:
- Blockage ID: The unique Blockage ID, which can be copied by clicking
 on the right;
 - Fraud Type: The type of fraud identified by the system; you can hover over the symbol for a brief description of the fraud type;
- Fraud Probability: The estimated probability that the call attempts are fraudulent, expressed as a percentage;
- Importance: Importance level (set manually for custom rules);
- Method: The protection method used (Proactive Monitoring, Behavioral Analysis or Custom Rules);
- Rule ID: The ID of the applied rule (this information can be helpful if custom rules are used);
- Blocked at: The date and time when the blockage was set;
- Expires at: The date and time when the blockage expires;
- Expires in: The current duration of the blockage before its expiration.
- Blockage ID: The unique Blockage ID, which can be copied by clicking
- Scope. This section contains the following information:
- A-range: The calling (source) side, which can contain a number range, a country, or a network;
- Source: The calling country and/or network name;
- B-range: The called (destination) side, which can contain a number range, a country, or a network;
- Destination: The called country and/or network name.
In the CALL ATTEMPTS tab, you can find a table of fraudulent call attempts affected by the blockage. You can customize the columns by clicking the button above the table. Here you can add (or remove) the needed columns by ticking (or unticking) the box on the left, or change the order of columns in the table by holding down the = button and moving the corresponding column up or down. After customizing the columns click the SAVE button to apply the changes, or click the RESET button to revert the changes to the previous setup. Click the CANCEL button to cancel the changes and exit the pop-up window.
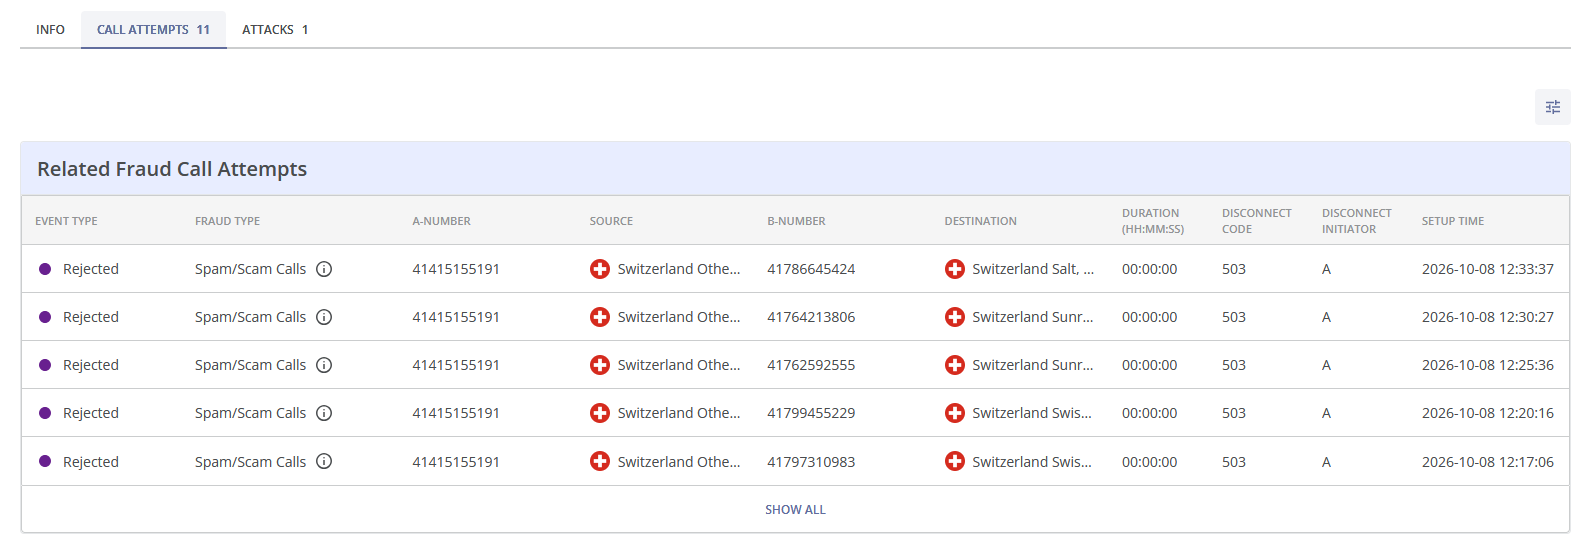
Clicking an attempt in the table will take you to the corresponding Fraud Call Attempt Details page, while the SHOW ALL button will take you to the corresponding Fraud Call Attempts page with the selected Blockage ID and the fraudulent call attempts blocked by it.
In the ATTACKS tab, you can find a table of related fraud attacks. You can customize the columns by clicking the button above the table. Here you can add (or remove) the needed columns by ticking (or unticking) the box on the left, or change the order of columns in the table by holding down the = button and moving the corresponding column up or down. After customizing the columns click the SAVE button to apply the changes, or click the RESET button to revert the changes to the previous setup. Click the CANCEL button to cancel the changes and exit the pop-up window.

Clicking an attack in the table will take you to the corresponding Fraud Attack Details page.